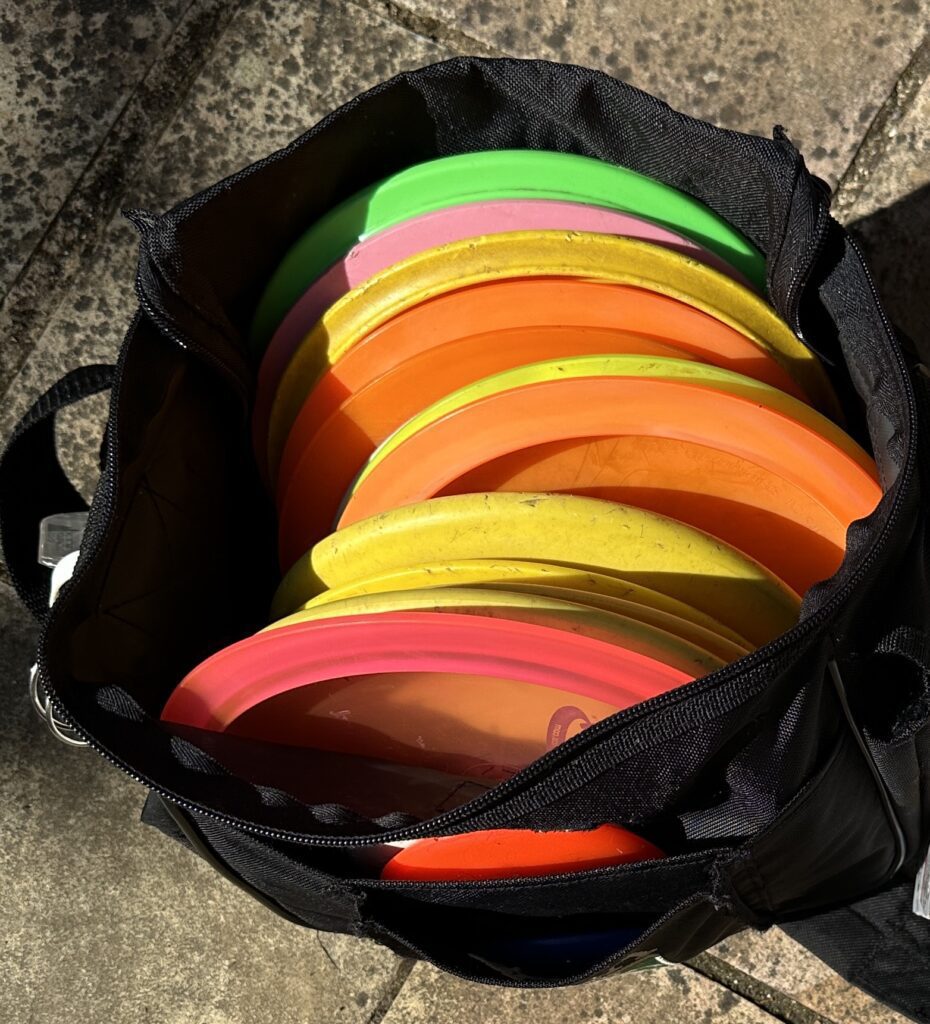
Ever spotted people flinging colourful discs around the park and wondered what they were up to? Welcome to disc golf, the sport you didn’t know you needed in your life! This guide will take you from mildly curious spectator to weekend warrior, with all the basics, pro tips, and secrets to start looking like you know what you’re doing—even if you don’t just yet. In this article, you’ll learn the basics of disc golf, how to choose the right discs, essential throwing techniques, etiquette, and how to avoid common beginner mistakes. So grab a water bottle, lace up your walking shoes, and get ready to experience the joy of disc golf!
Alright disc golf enthusiasts! Ever watched a group casually flinging colorful discs around the park and wondered what it’s all about? Maybe you’ve even considered giving it a whirl yourself. Well, consider this your official welcome to the fantastic world of disc golf!
This guide is your launchpad, transforming you from a curious onlooker into a confident course conqueror. Here’s the thing: disc golf might seem intimidating at first glance. But trust me, the learning curve is gentle, the sport is incredibly affordable, and the rewards are immense. This guide will equip you with the knowledge you need to navigate the fairway with ease, build a killer starter bag on a budget (without sacrificing quality!), and most importantly, have a blast doing it.
So, grab a water bottle, lace up your walking shoes, and let’s get throwing!
Understanding the Basics of Disc Golf
Disc golf is the perfect blend of simplicity and satisfaction. Picture this, a sun-drenched park, fresh air, and the undeniable thrill of watching a disc soar gracefully toward a basket. (Or, in the beginning, towards that cluster of trees you’re definitely going to hit.). The goal? Get that disc in the basket in the fewest throws possible, just like regular golf. Simple, right?
But within this simplicity lies a delightful layer of complexity. Different discs behave differently in flight, demanding a touch of finesse and strategy. Mastering your throws, understanding disc types, and navigating the course’s obstacles – that’s where the real fun begins!
Disc golf, at its core, is a beautiful marriage of accessibility and challenge. It’s a low-impact sport for beginners, perfect for people looking to stay active without the strain of high-impact activities. Imagine this: a scenic park, fresh air, gentle exercise, and the satisfaction of launching a disc towards a basket
Unveiling the Mystery: Disc Flight Explained
You’ve seen the discs, you’ve (hopefully) grasped the basic concept of the game, but what makes one disc fly further or curve differently than another? Buckle up, because we’re about to crack the code on disc flight! Every disc comes with four mysterious numbers stamped on it—speed, glide, turn, and fade. Think of these like the personality traits of your disc: how eager it is, how gracefully it flies, and whether it has a mind of its own. Here’s a quick translation to make sense of it all.
Understanding Disc Flight Numbers:
- Speed: This number (typically ranging from 1 to 14) indicates the overall power required to achieve a disc’s maximum distance potential. Think of it like engine size in a car. Higher speed discs require a faster, more powerful throw to reach their full potential. Beginners should generally start with slower speed discs (think 3-7) for easier control.
- Glide: This number (typically ranging from 1 to 7) represents a disc’s ability to stay airborne after release. Higher glide discs will “hang” in the air for longer periods, allowing them to travel further with less power. Glide is a fantastic friend for beginners, promoting smoother, more predictable flight paths.
- Turn: This number (often represented by a plus (+) or minus (-) symbol) indicates the disc’s initial tendency to turn right (plus) or left (minus) during its flight path. Understable discs (negative turn) will naturally curve left for beginners (right-handed throwers). Stable discs (zero turn) will fly straighter with minimal curving. Overstable discs (positive turn) will resist turning and even finish with a slight rightward fade for beginners (right-handed throwers). Beginners should generally choose neutral or slightly understable discs for easier control.
- Fade: This number (often represented by a plus (+) or minus (-) symbol) indicates the disc’s tendency to “fight back” at the end of its flight path, typically resulting in a leftward turn (for right-handed throwers). Higher fade discs will finish with a more pronounced leftward curve, useful for navigating tight fairways or overcoming obstacles. Beginners can stick with discs with minimal fade for now.
Remember: Don’t get overwhelmed by these numbers! As you gain experience, you’ll develop an intuition for how these factors work together to influence disc flight. But for now, focus on the basic principles and prioritize discs with slower speeds, high glide, neutral turn, and minimal fade.
Gearing Up for Glory: Building Your Disc Arsenal
Starting Disc Golf: Your Essential Gear (Building a Beginner Disc Golf Bag)
Now, onto the exciting part – acquiring your first discs! Start small and embrace simplicity. Building your skills with just a couple of trusty discs is like learning to play guitar with just three chords—it’s all you need to look (and feel) like a pro. Besides, fewer discs mean fewer chances to accidentally lose one in the bushes. Think of it like mastering a few basic chords on a guitar before diving into complex riffs. Here are the two key discs you absolutely need to get started:
Choosing the Right Discs for Beginners: Discs Every Disc Golfer Needs (But Beginners Can Start Simple)
Putter: Your Close-Range Champion
Your putter is your trusty sidekick for those close-range approaches and that oh-so-satisfying feeling of sinking a putt in one throw (known as an ace!). Look for a putter with a slow speed rating (think 3-5) and a high glide rating (around 4-7). This translates to easy control and a predictable flight path. Here are some fantastic beginner-friendly putter options:
- Innova Aviar: A true legend, the Aviar is renowned for its straight flight and incredible versatility. It’s available in a variety of plastics, catering to different throwing styles and preferences.
- Dynamic Discs Warden: This putter boasts a slightly deeper rim compared to the Aviar, offering a comfortable grip for many beginners. It flies straight and stable, making it a reliable choice for approach shots.
- Discraft Roach: This putter features a bead (a raised ridge) on the rim, which some beginners find enhances their grip and control. The Roach offers a touch more stability than the Aviar, making it a good option for windy conditions.
Midrange Disc: The Versatile Workhorse
Bridging the gap between your putter and a driver, your midrange disc is a multi-tasking marvel. It’s perfect for accurate approach shots and navigating those tricky mid-range distances. Aim for a midrange with a neutral flight pattern (meaning it won’t turn drastically left or right) and a speed rating in the 5-7 range. Here are some popular beginner midrange picks:
- Innova Roc: This iconic midrange disc is a staple in many disc golfers’ bags, regardless of skill level. It offers a predictable, straight flight path, making it perfect for learning proper form and dialing in your accuracy.
- Discraft Buzzz: Another legendary disc, the Buzzz is known for its straight flight and reliable fade at the end of its flight path. It’s a fantastic all-around midrange that can handle a variety of throws and situations.
- Innova Mako3: This midrange disc offers a touch less stability compared to the Roc, making it a great choice for beginners who struggle with overpowering their throws. The Mako3 flies predictably with a gentle fade, perfect for finesse shots.
Remember: These are just a few suggestions! Don’t be afraid to visit your local disc golf store or browse online retailers (like Infinite Discs, known for their vast selection and in-depth disc information) to explore other options that might suit your grip and throwing style.
Second-Hand Gems: While starting fresh is always an option, consider exploring the second-hand market for discs! Websites like eBay or local disc golf communities often have gently used discs at a fraction of the retail price. This allows you to experiment with different brands and molds without breaking the bank. Just make sure the discs are in good condition, free of major cracks or warping, before purchasing.
Ready to Hit the Course? Gear Up with the Innova DX Starter Set!
Feeling overwhelmed by all these disc options? The Innova DX 3 Piece Disc Golf Starter Set takes the pressure off. It’s got everything you need to start: a driver for those hero shots, a midrange for getting out of sticky situations, and a putter to finish the job. Think of it as disc golf’s version of a ‘starter pack’—simple, effective, and almost impossible to mess up.
While we previously discussed starting with just a putter and a midrange disc, the Innova DX 3 Piece Disc Golf Starter Set offers a convenient and affordable way to get all the essential discs in one go. The driver included in this set can be particularly helpful as you progress in your disc golf journey and start wanting to tackle longer throws.
This value-priced set includes all the essential discs you need to conquer the course:
- A Driver: Great for achieving maximum distance on your throws.
- A Midrange Disc: Ideal for accurate approach shots and navigating those tricky mid-range distances.
- A Putter: Your trusty companion for close-range approaches and sinking those satisfying putts.
Made with Innova’s DX plastic, these discs are durable and affordable, perfect for learning proper form without breaking the bank. DX plastic also provides excellent grip in all weather conditions, ensuring a comfortable throwing experience.
An Investment in Your Disc Golf Journey:
While DX plastic discs tend to become more understable (meaning they curve less) over time with heavy use, this characteristic can be a benefit for beginners. The initial stability helps you learn proper throwing technique, and as your skills develop, the discs will gradually adjust to your throws.
The Innova DX 3 Piece Disc Golf Starter Set is a fantastic choice for anyone ready to embark on their disc golf adventure. It provides everything you need to get started, is easy on the wallet, and offers discs that adapt to your growing skills!
Selecting a Disc Golf Bag (Without Breaking the Bank)
Now that you’ve got your discs, they need a home! Enter the disc golf bag—your mobile headquarters. The two main options are backpacks (for those who want to bring half their house) and shoulder bags (for minimalists who just want to look cool and carry a few discs). Here’s the breakdown:

Backpacks vs. Shoulder Bags:
The two main bag styles are backpacks and shoulder bags. Here’s a breakdown to help you decide:
- Backpacks: Backpacks offer the most storage space, perfect for carrying additional discs, water bottles, towels, snacks, and even a light jacket. They distribute weight evenly across your shoulders, making them ideal for longer courses or carrying a larger disc collection. However, backpacks can feel bulky for some beginners, especially if they only carry a few discs.
- Shoulder Bags: Shoulder bags are a more minimalist option, great for carrying your essential discs, water bottle, and maybe a light sweater. They’re lightweight, comfortable for short courses, and perfect for those who prefer a streamlined approach. However, shoulder bags offer limited storage space and can become uncomfortable on longer walks or when carrying heavier loads.
Essential Throwing Techniques: Mastering Your Moves
Alright, time for the fun bit: throwing! Warning: your first throws may look less like an elegant glide and more like an overzealous frisbee toss. That’s part of the charm. Here’s a breakdown of two fundamental throwing techniques: the backhand throw and the forehand throw.
The Backhand Throw (Right-Handed Thrower):
The backhand throw (RHBH) generates power through a coordinated sequence. This is your go-to move and the most natural throw for most players. Start with a balanced stance, grip the disc comfortably, and initiate a controlled swing with your right arm. As you rotate your hips, pull the disc across your chest and release it with a flat trajectory. Follow through with your entire body for added accuracy and distance.
- Grip
Hold the disc comfortably in your hand, with your thumb resting on the flight plate and your fingers curled around the rim.
- Stance
Stand sideways with your feet shoulder-width apart. Your throwing shoulder should be facing the target, with your weight balanced on your back foot.
- Windup
Take the disc back behind your body, keeping your arm relatively straight.
- Power Pocket
As you initiate the throw, bring the disc across your chest, creating a “power pocket” for maximum leverage.
- Release
Snap your wrist and release the disc with a flat trajectory. Follow through with your entire body for added power and accuracy.
The Forehand Throw (Right-Handed Thrower):
The forehand throw (RHFH) utilizes a sidearm motion for powerful throws. Grip the disc comfortably, engage your core, and initiate a throwing motion with your right arm across your body. Maintain a flat disc angle during the release and follow through with your entire body for control and distance.
- Grip: Hold the disc with your index finger curled around the rim and your thumb resting on the underside of the flight plate.
- Stance: Stand sideways with your feet shoulder-width apart. Your throwing shoulder should be facing the target, with your weight balanced on your back foot.
- Windup: Bring the disc across your body in front of your chest, keeping your arm relatively straight.
- Power Pocket: As you initiate the throw, extend your arm towards the target, creating a “power pocket” for maximum leverage.
- Release: Snap your wrist and release the disc with a flat trajectory. Follow through with your entire body for added power and accuracy.
Remember: These are just the basic guidelines! Mastering proper throwing technique takes time and practice. Here are some additional tips to keep in mind:
- Focus on Form: It’s more important to have a smooth, controlled throw than to overpower the disc. Focus on proper grip, footwork, and body mechanics for better accuracy and distance in the long run.
- Practice Makes Progress: The more you throw, the more comfortable and confident you’ll become. Dedicate some time in a park or open field to work on your throws.
- Start Slow: Don’t try to throw like a professional right away. Begin with shorter distances and gradually increase your power as your technique improves.
Conquering the Course: Your First Disc Golf Adventure
So, you’ve got your discs, your bag, and a basic understanding of throwing techniques. It’s time to hit the course! But before you unleash your inner champion (hold on that “unleashing” for a bit!), here are some tips for navigating your first disc golf adventure:
- Finding a Course: Most parks have designated disc golf courses, with markers indicating tee pads (starting points) and baskets. Utilize online resources or mobile apps such as UDisc to find courses near you.
- Course Etiquette:
- Courtesy is Key: Disc golf is a shared activity. Be mindful of other players on the course and avoid throwing when someone is in your way.
- Respect the Course: Don’t litter or damage the course environment. Leave it as you found it for future players.
- Hole Basics: Each hole on a disc golf course has a designated tee pad (starting area) and a basket (target). The goal is to complete the hole in the fewest throws possible.
- Multiple Tees: Some courses offer multiple tee pads for each hole, catering to different skill levels. Beginners should typically start from the shorter, “white” tee pads.
- Playing the Game:
- One Throw at a Time: Take one throw at a time, and be sure everyone in your group is clear before throwing.
- Marking Your Lie: If your disc lands in a less-than-ideal spot (like a pond!), you’ll need to mark your lie where ir was last in bounds (position) with a disc or marker. You’ll then incur a penalty stroke for the bad throw and resume play from a designated distance away.
- Counting Your Throws: Keep track of the number of throws you take on each hole. The player with the lowest total score for the entire course wins!
Avoiding Common Beginner Mistakes in Disc Golf
We’ve all been there—the wobbly throws, the complete misses, and the inevitable disc lost in the bushes. But hey, that’s part of the fun! Here are a few common beginner mistakes and how to avoid them:
- Forcing Power: Beginners often try to throw discs too hard, resulting in wobbly throws and inaccurate shots. Focus on smooth, controlled throws with proper form for better results.
- Leaning Back on Release: Especially with backhand throws, beginners often lean back at release. This can cause the disc to “nose up” and veer left (for right-handed throws). Maintain a balanced stance with your weight slightly forward for a cleaner, more accurate flight path. (Except uphill throws, where a slight weight shift back can be helpful).
- Ignoring Technique: Taking the time to learn and practice proper throwing technique will pay off in the long run. It might feel awkward at first, but stick with it – your accuracy and distance will improve significantly.
- Disc Confusion: Don’t overwhelm yourself with a massive disc collection right away. Start with your putter and midrange disc, and learn how to control them before expanding your arsenal.
- Course Confusion: Before heading out, familiarize yourself with basic disc golf terminology (tee pad, fairway, basket) and course etiquette. You can often find course maps and layouts online on the UDisc App or at the course itself.
- Getting Discouraged: It’s natural to feel discouraged by bad throws or missed putts, especially when you’re new. But remember, everyone makes mistakes! The beauty of starting disc golf is that you see noticeable improvement relatively quickly with consistent practice. Focus on enjoying the fresh air, the challenge of the course, and the learning process. Before you know it, you’ll be sinking those putts and launching impressive throws!
Expanding Your Horizons: Resources and Next Steps
By now, you’re hopefully brimming with disc golf enthusiasm! Now what? Here are some resources and next steps to keep you on your disc golf journey:
- Local Disc Golf Clubs: Many communities have active disc golf clubs that host tournaments, organize casual rounds, and provide a platform to connect with other players. Joining a local club is a fantastic way to improve your skills, learn from experienced players, and make new friends who share your passion for the sport.
- Practice, Practice, Practice!: The key to disc golf improvement is consistent practice. Find a local park with open space and dedicate some time to working on your throws. Focus on smooth form, proper grip, and following through on your releases.
- Online Resources and Social Media: There’s a wealth of online resources for disc golf, including instructional videos, course reviews, and disc reviews. Check out websites like the PDGA or YouTube channels like “Disc Golf Guy” for tips. Want to stay informed about the disc golf world? Follow us across our social media platforms! We provide fun and informative disc golf content, including general news and updates on [X]. We’re also active on:
- YouTube: @GolfWithDiscs
- TikTok: @golfwithdiscs
- Instagram: @golfwithdiscs
- Have Fun!: Remember, disc golf is all about having fun. Embrace the fresh air, enjoy the challenge, and connect with the incredible community of disc golfers around the world.
Conclusion: The Disc Golf Journey Continues!
This guide has given you everything you need to get started—now it’s up to you to put it into action. So grab your discs, find a course, and get out there! Just remember, the goal isn’t to be perfect; it’s to have fun, make a few glorious (and not-so-glorious) throws, and maybe even sink a putt or two. Disc golf isn’t just a sport; it’s a journey. And yours is just beginning. Embrace the fresh air, enjoy the challenge, and connect with the incredible community of disc golfers around the world. As you progress, don’t hesitate to explore new discs, refine your throws, and challenge yourself on more advanced courses. There’s always something new to learn and discover in the world of disc golf. So, grab your discs, head to your local course, and get ready to experience the joy of flight!
FAQs about starting disc golf
To hit the ground running in disc golf, you’ll need just two discs! A putter, ideally with a slow speed (3-5) and high glide (4-7) for easy control, will be your best friend for close-range approaches and sinking those satisfying putts. Your other essential disc is a midrange, rated around 5-7 speed and boasting a neutral flight pattern. This versatile workhorse tackles mid-range distances and trickier approach shots with ease.
There are three main types of discs in disc golf: putters, midranges, and drivers. Putters are used for short approach shots and putting. Midranges are versatile discs that can be used for a variety of shots, from short approaches to long drives. Drivers are the fastest discs and are used for maximum distance throws.
When starting out, it’s best to focus on a putter and a midrange disc. Look for a putter with a slow speed rating (3-5) and a high glide rating (4-7). For your midrange, choose a disc with a neutral flight pattern (meaning it won’t turn drastically left or right) and a speed rating in the 5-7 range.
Some common beginner mistakes include forcing power on throws, ignoring proper throwing technique, getting overwhelmed with too many discs, and getting discouraged by missed shots. Focus on smooth form, practice regularly, and remember to have fun!
There are many online resources that can help you find a disc golf course near you. You can use the Professional Disc Golf Association (PDGA) website or UDisc mobile app to search for courses in your area


